How to change date and time on Windows
 Date and Time are standard elements of any OS that performs lots of functions: automatically creates a restore point, defragments the hard disk, and tracks downtime to put the system into sleep or power-saving mode. You see if these two parameters are incorrect, there will be disruptions in apps working.
In our article we will tell you how to change date and time in several ways.
How to Set Date and Time in System Parameters?
For changing date and time, go to the menu or hold down Win + I. and click on the gear icon. Then:
- Click “Time & Language”.

- Turn off the toggle “Set time automatically” and “Set time zone automatically”.

- Click on the “Time zone”.

- Choose the proper one.

- Click “Change” after “Change date and time”.

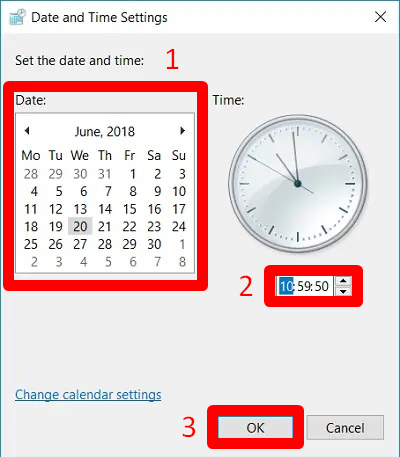
- Change the day, month, and year. Then set the time and click “Change”.

The process of configuring is completed.
How to Change Date And Time Using Control Panel?
Open the command prompt by pressing the keys Win + R. The next steps:
- Write “control”.
- Choose “Date and Time”.

- Click on “Change date and time”.

- Choose the day, month, year and the time. Then click “OK”.

- If you want to change a timezone, click “Change time zone” and choose the proper one.

Click “OK” again and leave the Control Panel.
How to Fix Date and Time Using The Taskbar?
The simpler and faster method to change these two parameters is with the taskbar. In the lower right corner you will see the current date and time. Move the cursor over the time, right click on it and choose “Adjust date/time”.

Then:
- Turn off the toggle “Set time automatically” and “Set time zone automatically”.

- Click “Change” under “Change time and zone”.

- Change the day, month, and year. Then set the time and click “Change”.

As you see, it’s easy to set date and time on Windows 10. If you have questions, write them in comments.