How to set up proxy on iOS: step-by-step instructions
 It's hard to imagine a person's life without mobile devices. For most people, mobile phones and tablets have become a miniature computer replacement. They are used to access the Internet, work with applications and mobile services, to communicate in social networks and messengers, games, etc. And IOS-based mobile devices are very popular with users.
For those who don't know, a proxy is a third–party server that serves as an intermediary between your device and the server you want to connect to. When connecting via proxy, your IP address changes to the IP of the proxy server. Your location information is also changing. This helps to maintain the anonymity of users and give false data to the servers of sites and services.
Configuring a proxy on iOS
Before setting up proxies, you need to purchase them. You can buy a high-quality US proxy on our website by placing an order in your personal account. After payment, you will receive the necessary data to access the proxy server.
To set up a proxy on iOS, you will need to follow these steps:
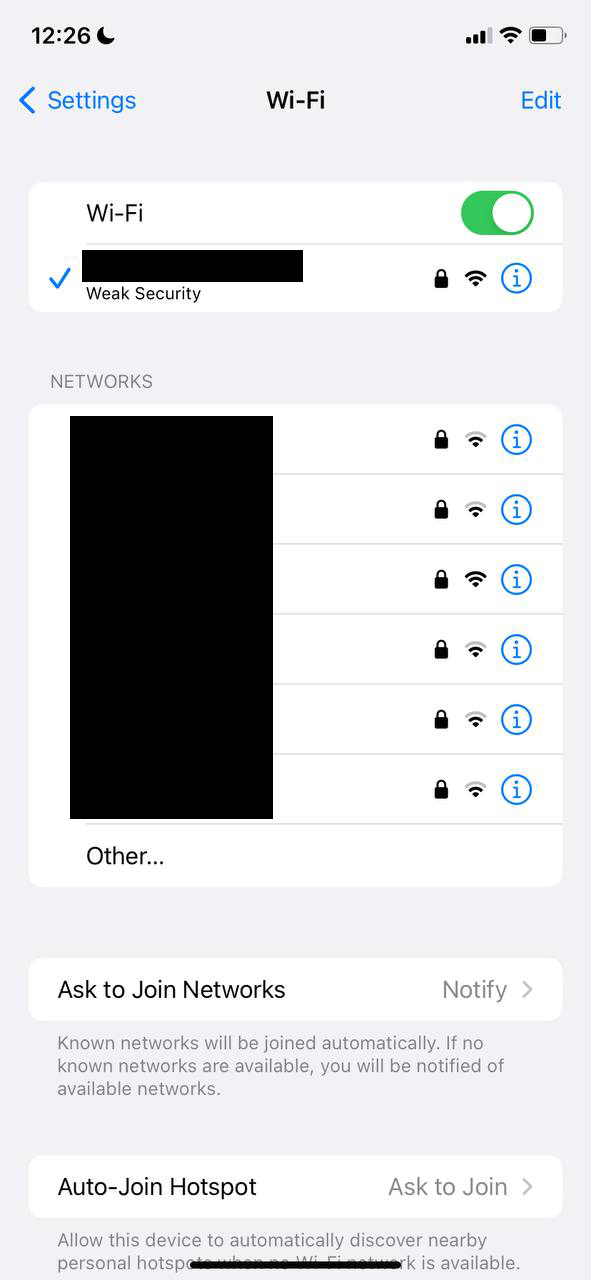
- Go to the main menu of your device and open "Settings", then select the "Wi-Fi" section.
- Find the network you are connected to, then click on the round "i" icon on the right.
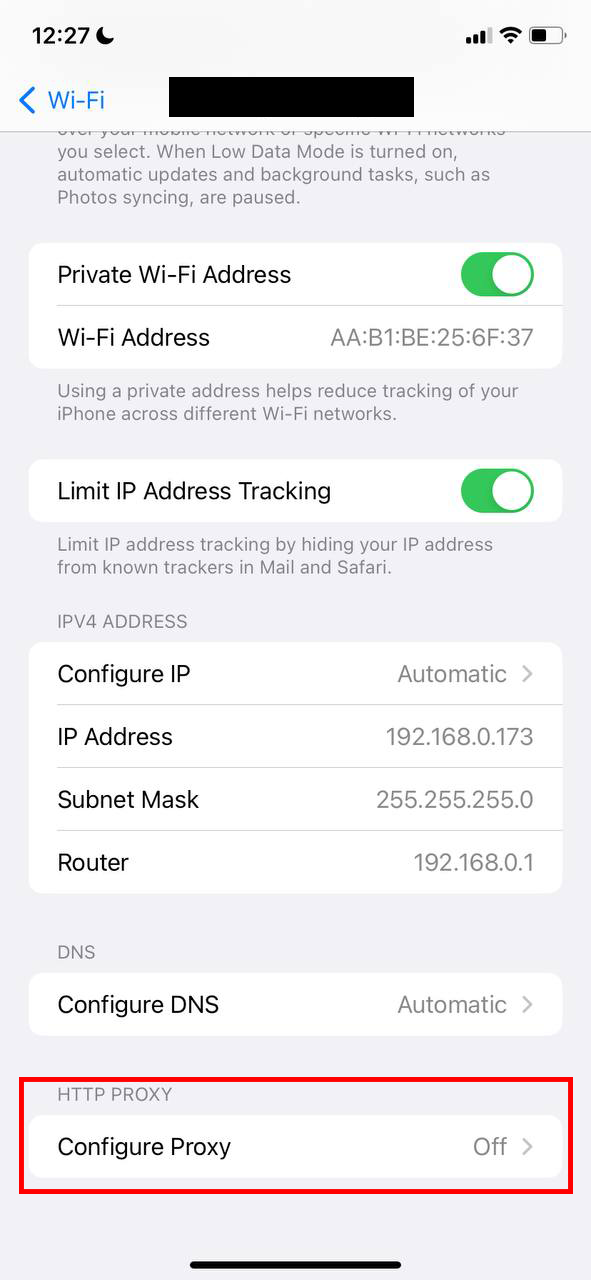
- Go down and find "Configure Proxy"
- Next, set up the proxy connection "Manual".
- After that, you will need to enter the data that you received when buying a proxy server: the proxy IP address and port.
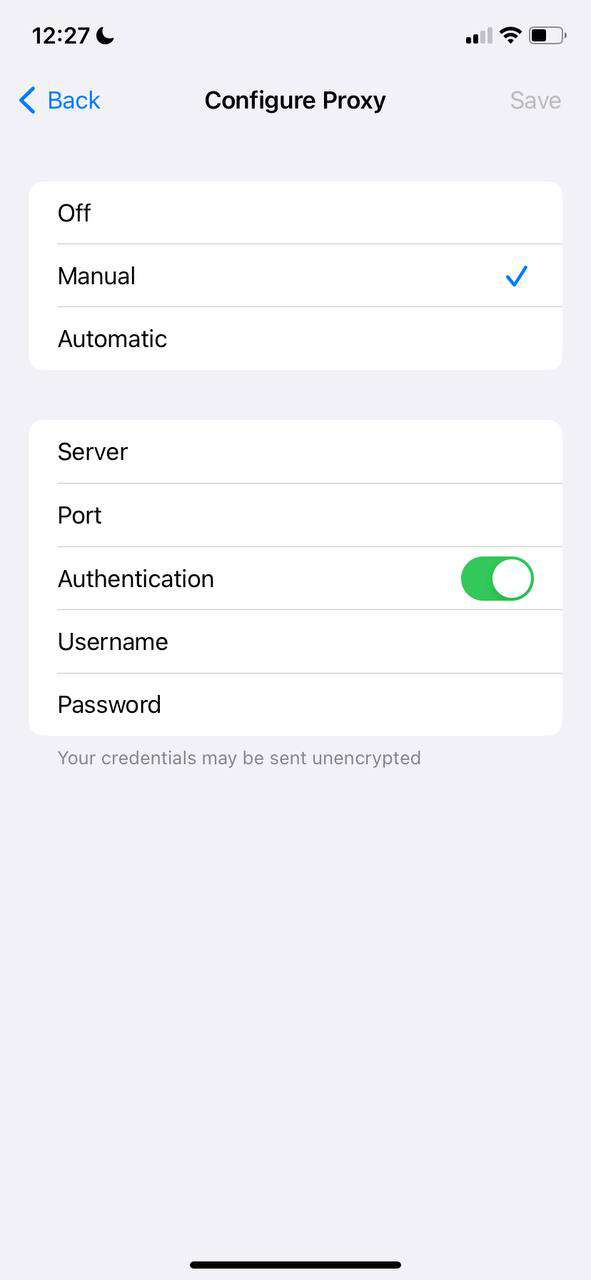
If your proxies come with a username and password, then you need to tick "Authentication" and enter the username and password in the appropriate fields.
After these steps, the proxy setup on iOS will be completed. Check the proxy functionality using Safari. To do this, go to any website. If the proxies work fine, then the site will load without problems.
I want to draw your attention to the fact that the standard settings do not always work correctly, so below we will analyze how to configure a proxy through a specialized Potatso Lite program.
Configuring proxy on iOS using Potatso Lite
With this program, you will be able to proxy both mobile traffic and Wi-Fi traffic. You can download the program to your phone using this link - https://apps.apple.com/ru/app/potatso-lite/id1239860606
To set up a proxy in Potatso Lite, you will need to follow these steps:
- Open the Potatso Lite program and click on the "Add a Proxy" button

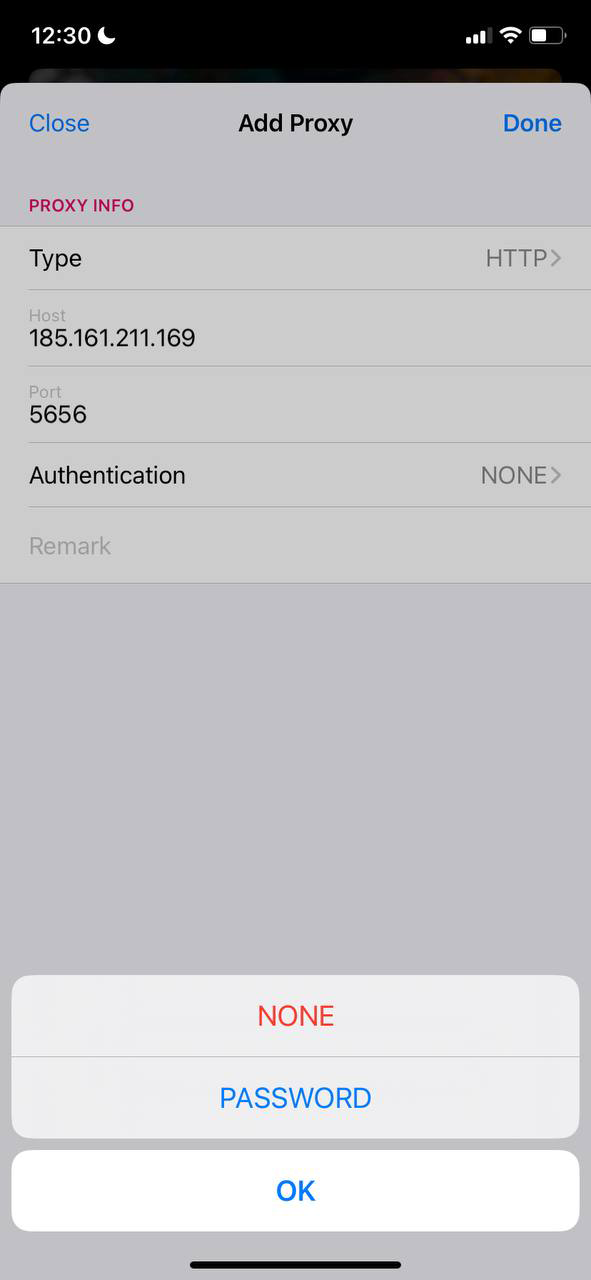
- In the window that opens, in the "Type" field, select the proxy type. In our case it will be HTTP
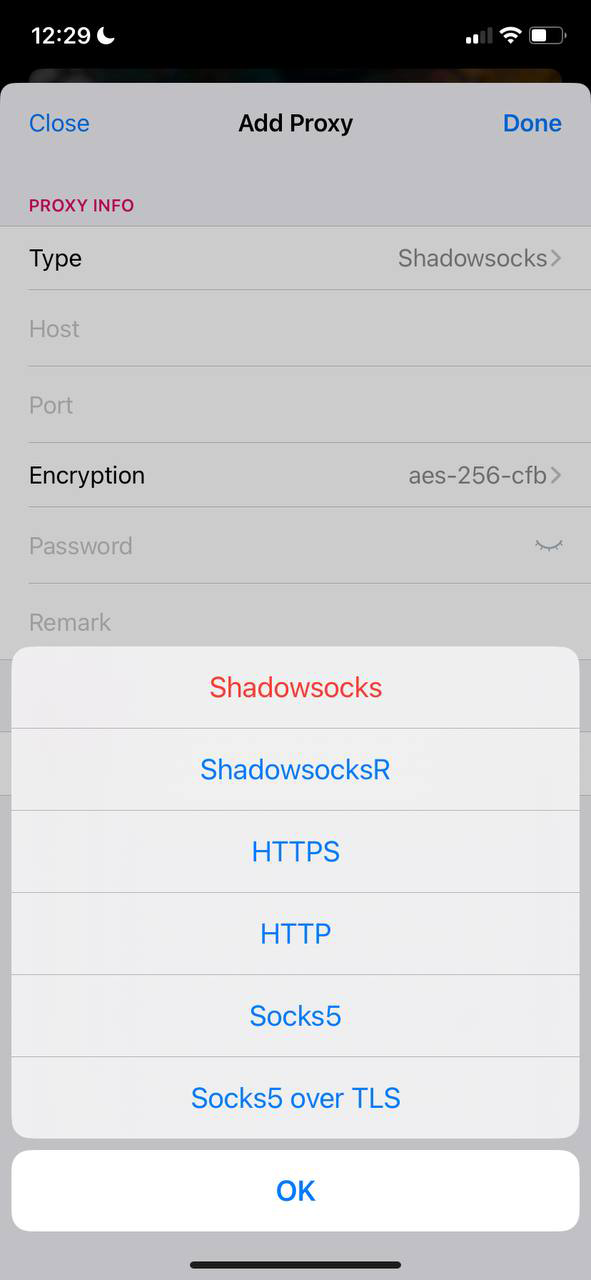
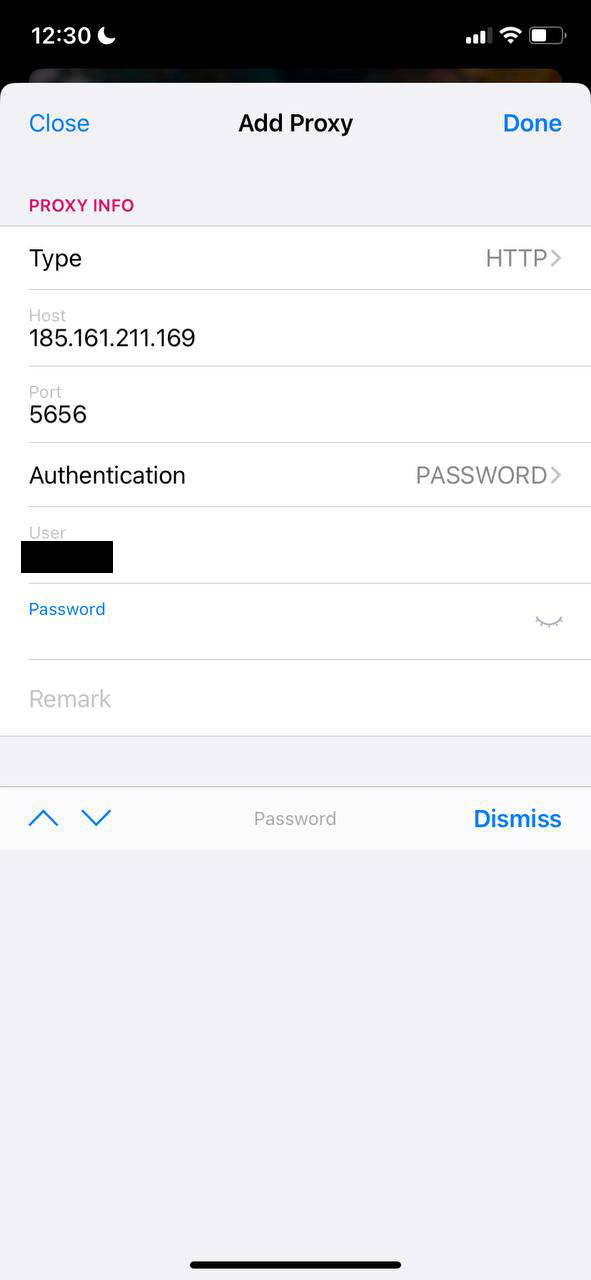
- Below, in the "Host" field, enter the proxy IP address, and in the "Port" field, respectively, the port. In the "Authentication" field, select "Password" (if the proxy requires login and password authorization).
- After you select "Password" you will have the fields "User" and "Password". In the "User" field, you need to specify the login from the proxy, and in the "Password" field, respectively, the password from the proxy. After you have entered all the data from the proxy, click on the "Done" button.
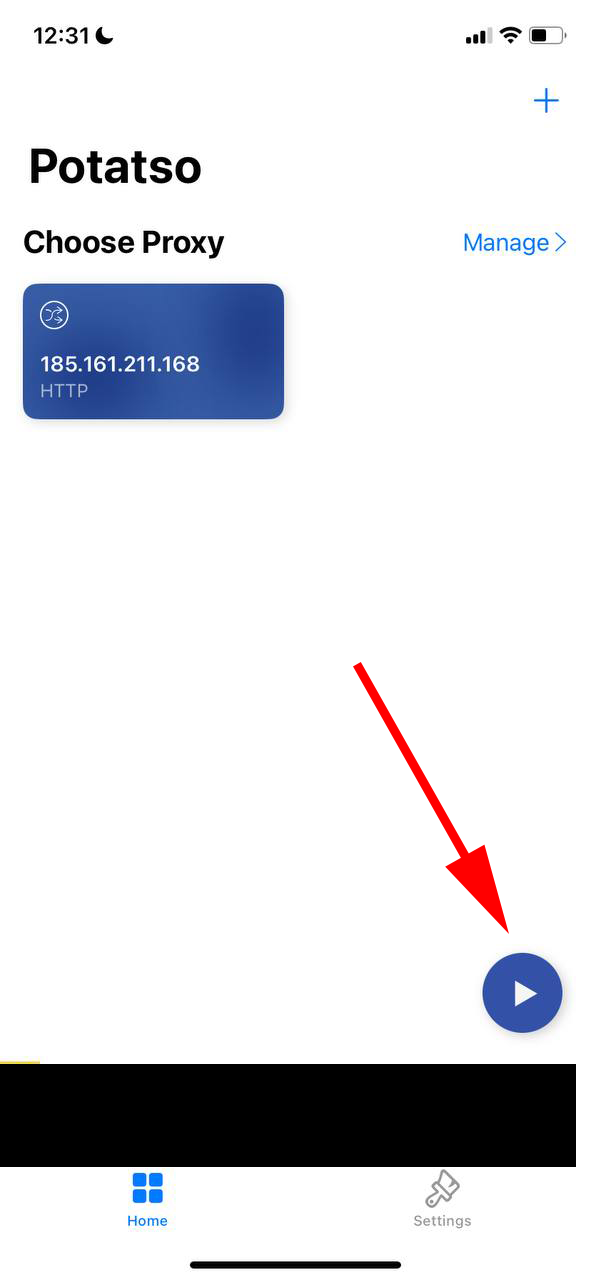
In order to enable the proxy, you need to select the desired proxy from the list (If you have several of them) and click on the blue enable button in the lower right corner. To disable it, you will need to click on the red button, which will be instead of the blue one.
When the proxy is first launched, the program will need to create a "VPN configuration" through which the proxy will work.
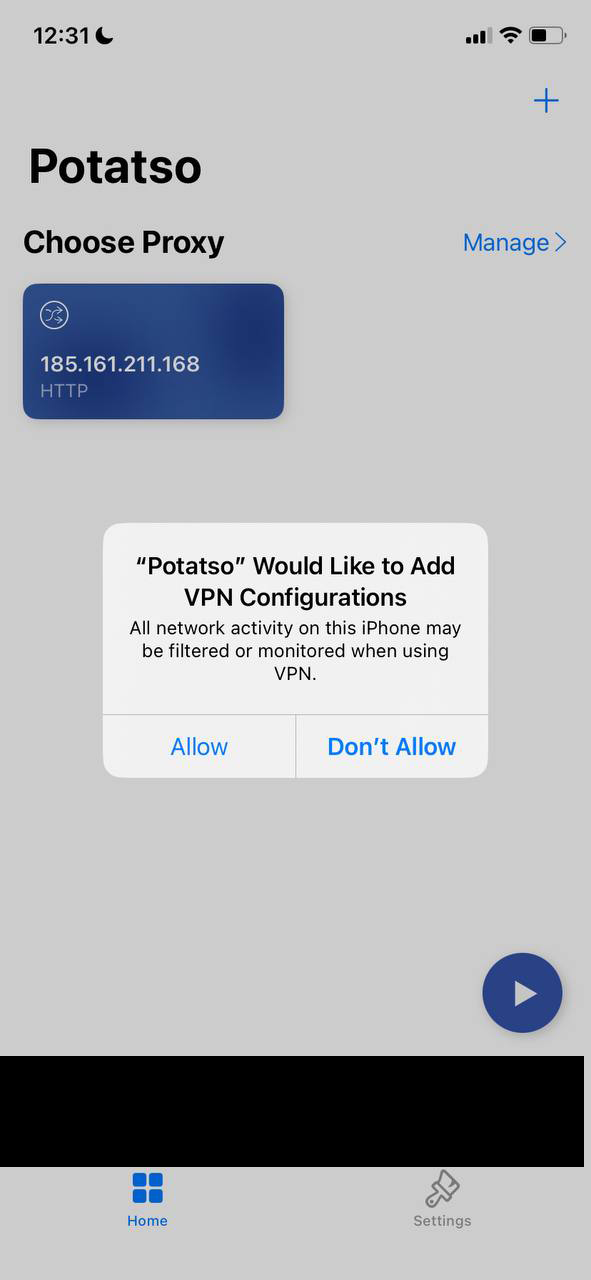
In order to create such a connection, you will need to click "Allow", and in the window that opens, confirm the creation of a "VPN configuration" using a FaceID or password.
If you have any problems with the proxy configuration and operation, contact our technical support, which will answer your questions and help solve problems at any time of the day.