2 Ways To Set up a proxy in Google Chrome on macOS in 2026

Let's break down 2 ways to set up a proxy in Google Chrome on macOS. Setting up a proxy in Google Chrome helps you optimize your browsing experience. A proxy is able to replace the user's real IP with one that's in a different city or even country..
This setup is usually a work task. SMM specialists and agencies manage several client accounts from one Mac and assign each project its own IP address. Sellers on Amazon, eBay, Wildberries and Ozon check competitors’ prices and listings the way buyers in another region see them. SEO specialists review localized search results and geo-targeted ads for different countries. In each case the proxy is configured once, and the rest of the browser workflow stays the same.
In June 2026, Chrome handled 72.24% of desktop page views worldwide, roughly 14 times Safari's 5.18%, while Apple's desktop platforms held a combined 16.37% of desktop traffic (the OS X and macOS categories in StatCounter's data). The audience keeps growing, too: on Apple's Q4 FY2025 earnings call, CFO Kevan Parekh reported Mac revenue up 13% year over year to $8.7 billion and noted that nearly half of Mac buyers were new to the platform.
Where to get proxies for Google Chrome
It's important to pick good proxies so that they work correctly. If you decide to use free option, we want to warn you about the risks. First, you'll have to try dozens of free proxies before you find a working server. Second, the free proxy will most likely not help you visit an inaccessible site because it is already on a ban list. Public proxies are used by hundreds of people, so they cannot guarantee anonymity.
These risks have been measured. Austrian security researcher Christian Haschek scanned 25,443 free proxy servers collected from public lists: 47.7% of them were offline, and among the 13,307 working servers 62.3% blocked HTTPS, 20.6% injected modified JavaScript and 18% altered HTML pages, which left roughly a third of the original list usable without tampering. "I didn’t expect so many proxies to ban HTTPS traffic," Haschek wrote; forcing plain HTTP lets a proxy owner read logins and everything else you send. In his earlier test of 443 proxies, only 21% passed all checks. The scan dates back to 2015, but no open study of comparable scale has been published since, and the core risk of unencrypted HTTP interception has not changed.
You should rent proxies from a reliable provider to make sure they work. For example, individual IPv4 proxies are assigned for one person only and work through protected protocols, so you are guaranteed anonymity and data protection on the Internet. You can see the range of proxies for rent on our website and choose a proxy that suits you. Contact our technical support if you have any questions - they’ll answer your question in a few minutes and help you make your choice.
Setting up through macOS system settings
Since Chrome doesn't provide for setting up a proxy inside the browser, we'll do the procedure through the operating system. The same applies to other Chromium-based browsers: Edge and Opera read this system proxy configuration too, so one setup covers every Chromium browser installed on your Mac. Before you start, keep the connection details from your provider’s dashboard at hand: the IP address, port, username and password.
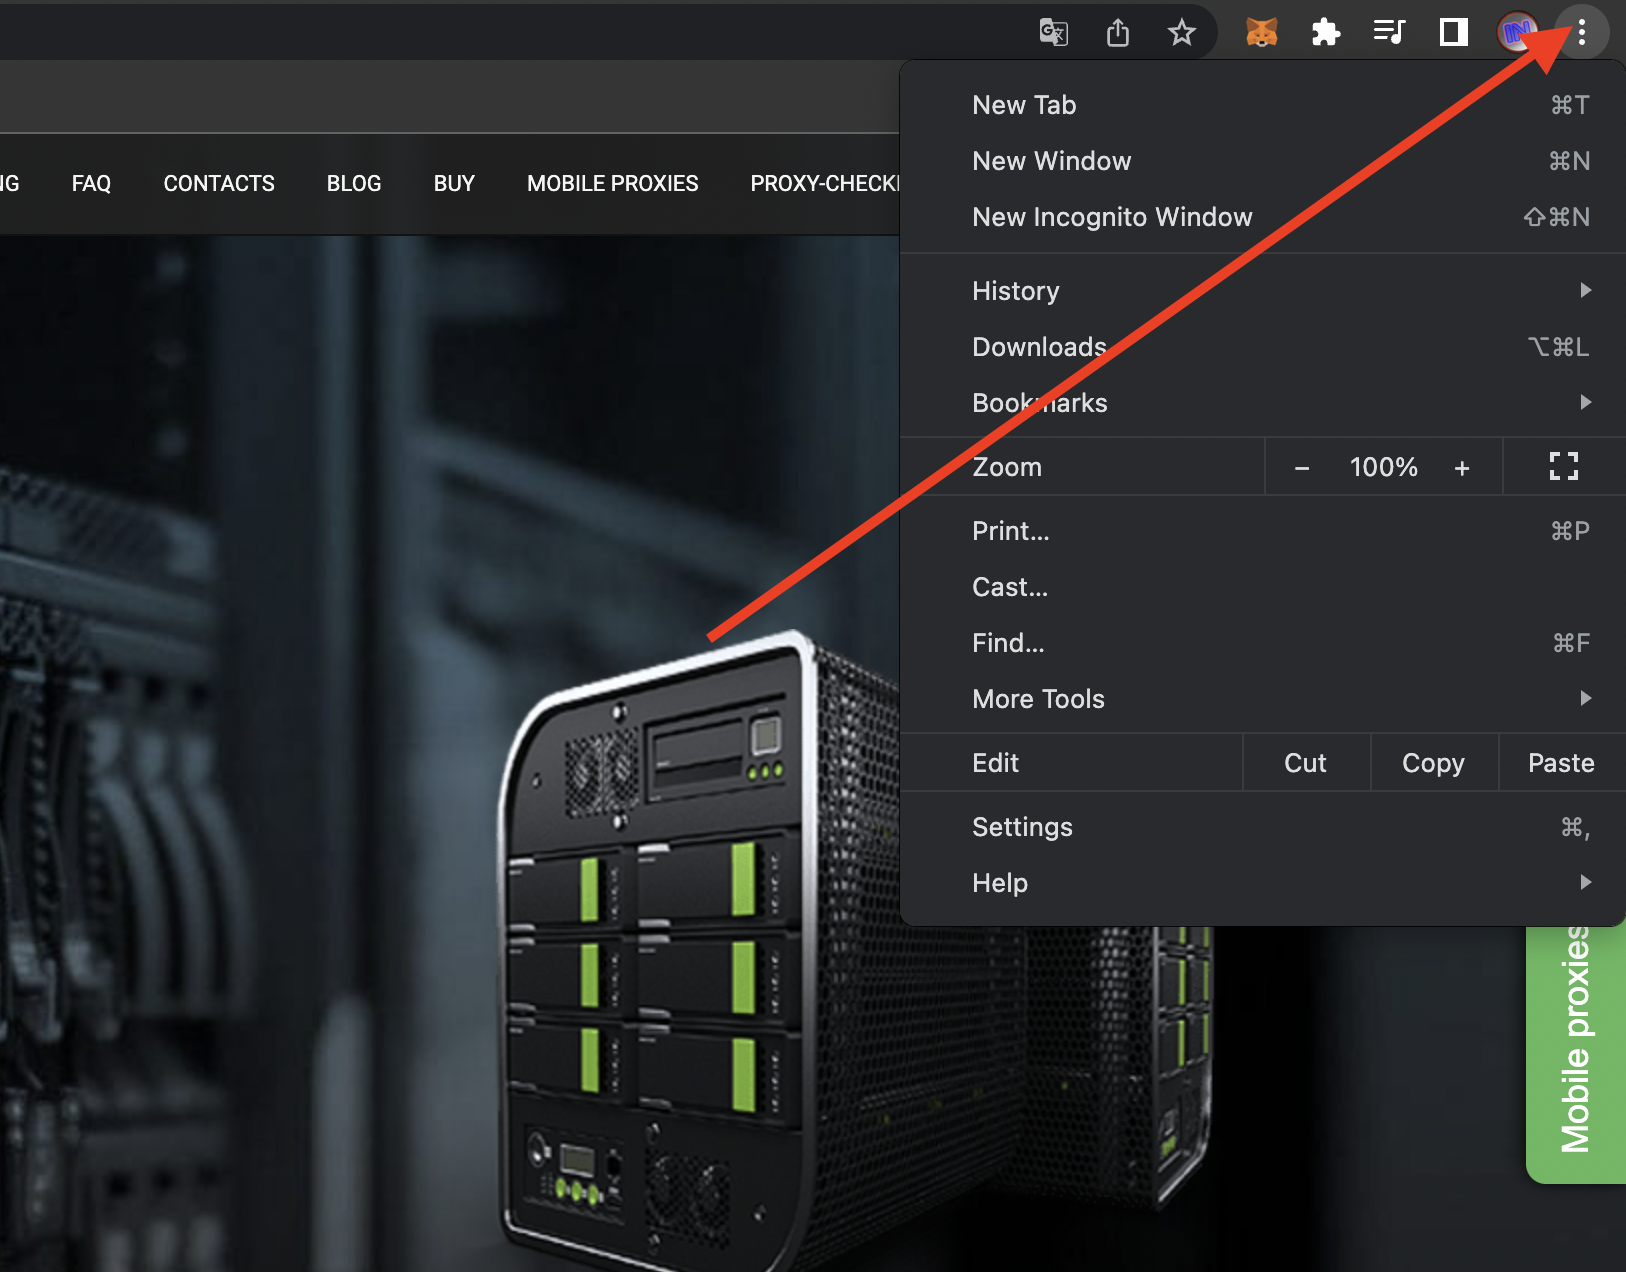
- Click on the three dots in the top right corner of the browser. Then select "Settings" from the drop-down menu. A tab with Chrome settings will open.
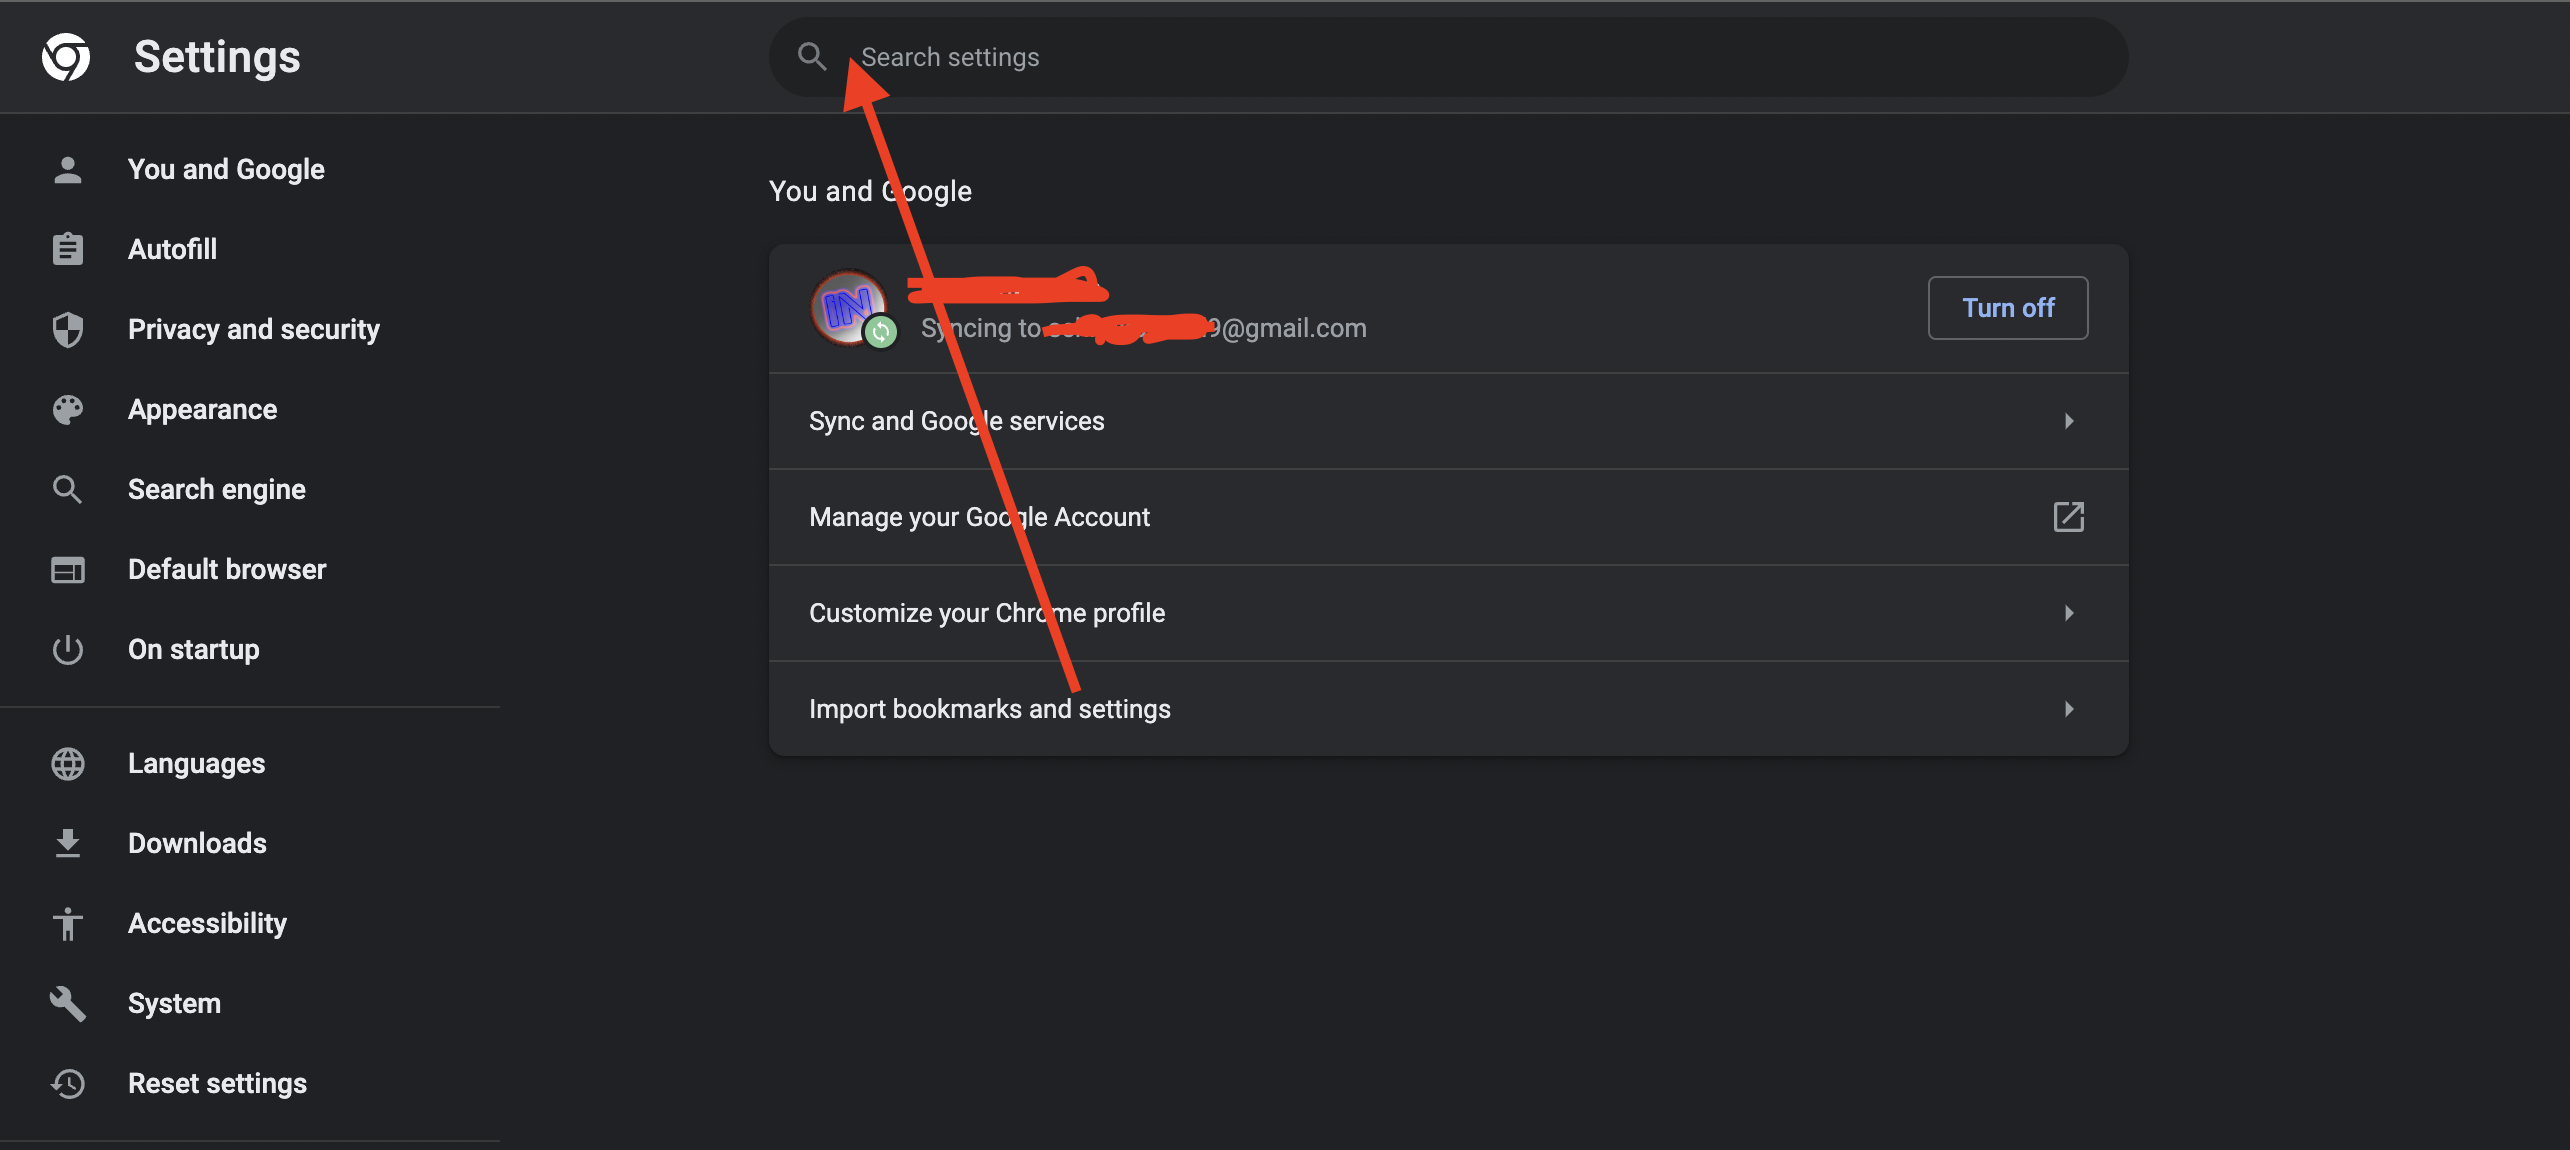
- Enter the query "Proxy" in the search bar. Chrome will show the setting you need in the search results.
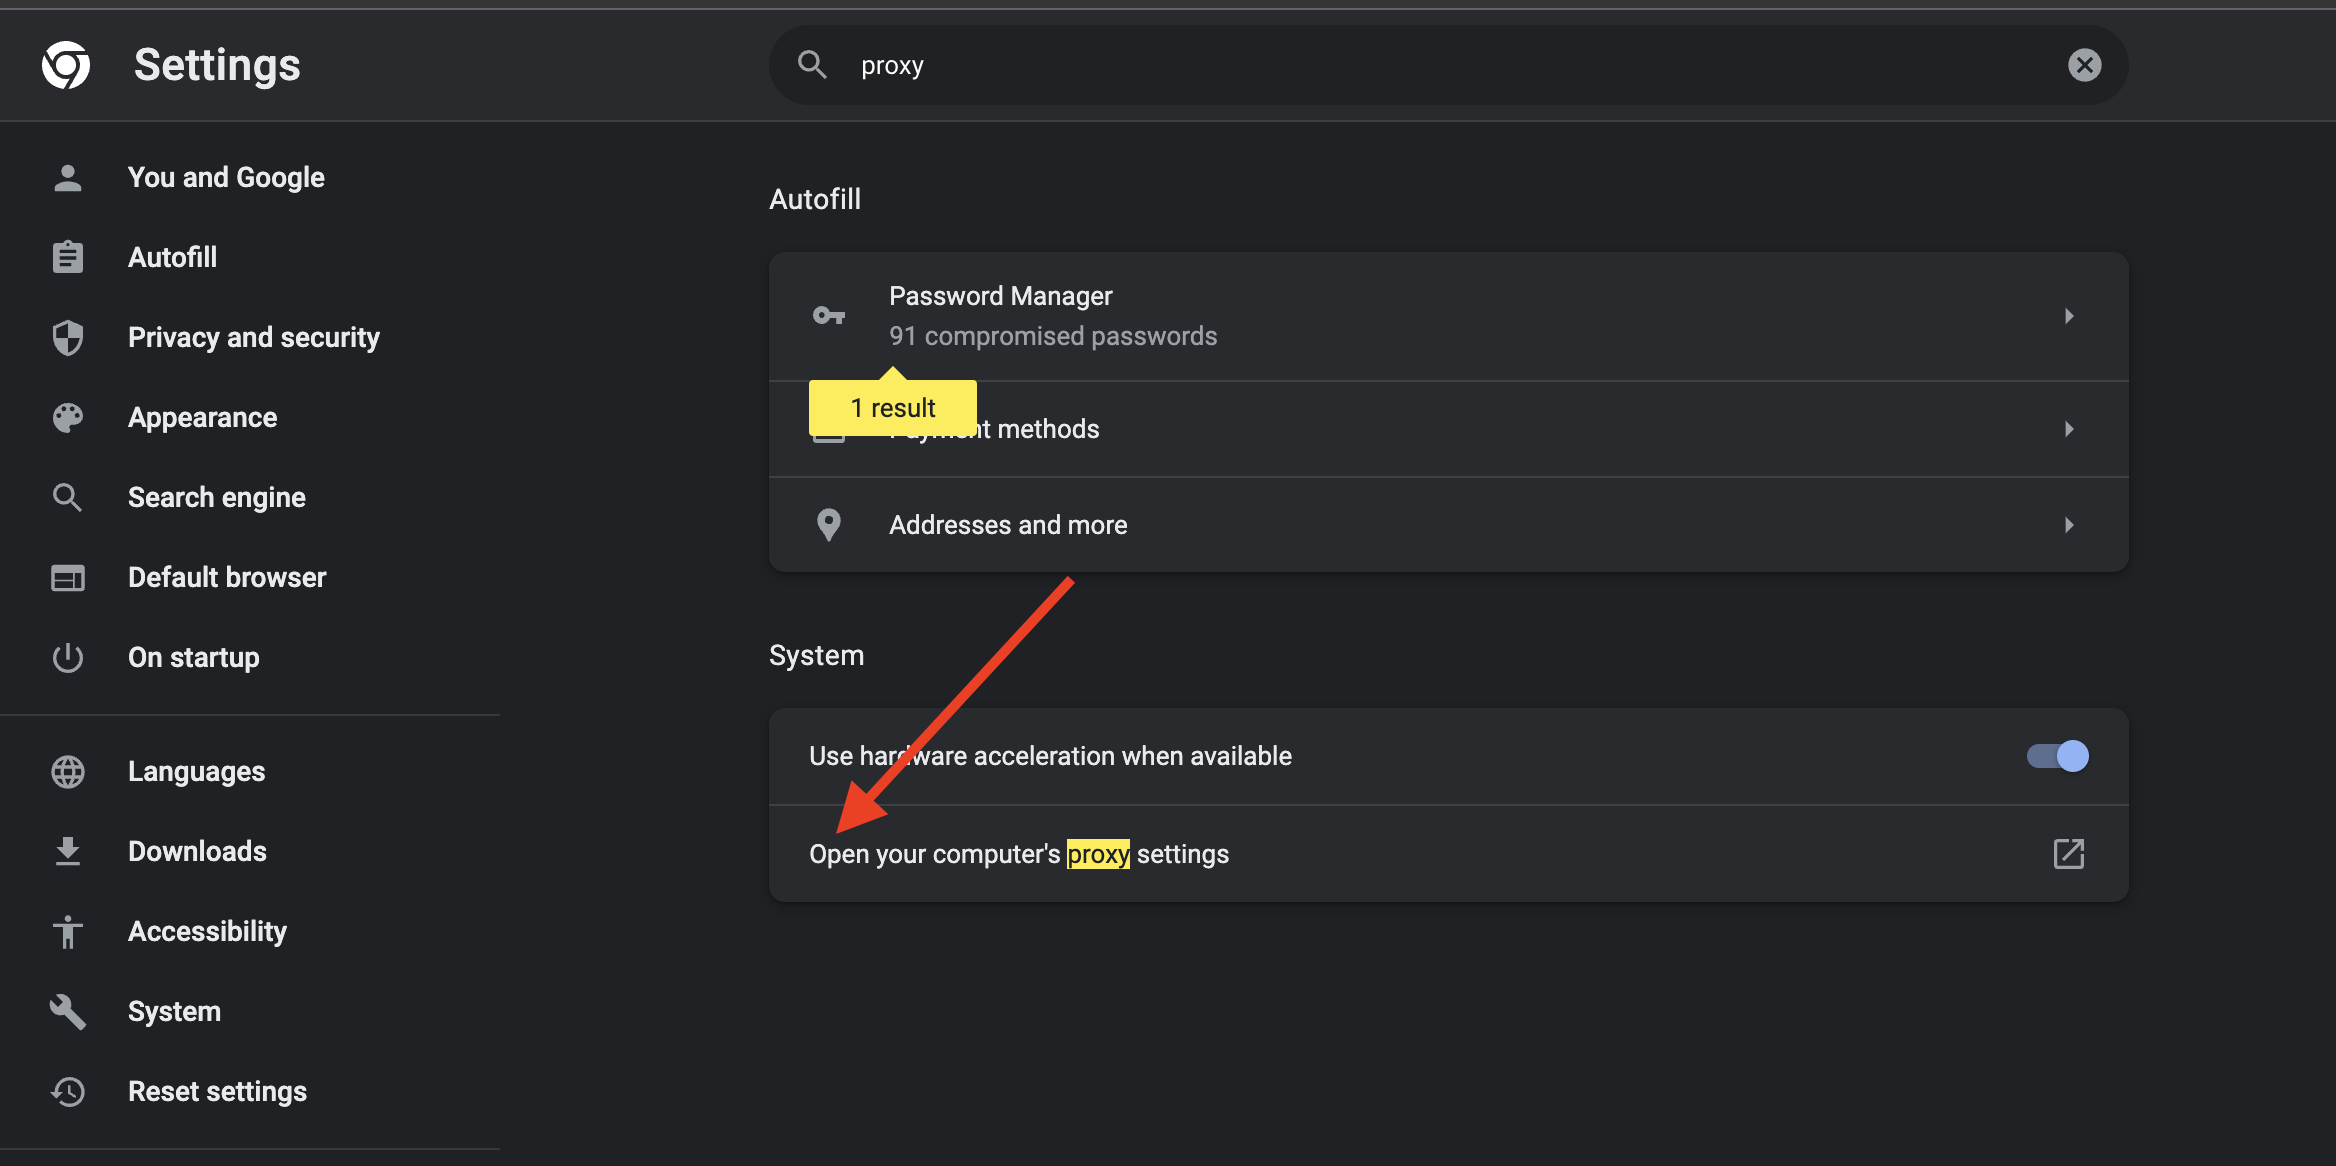
- Click "Open proxy server settings for computer". The system proxy window will open in a separate app, outside of Chrome.
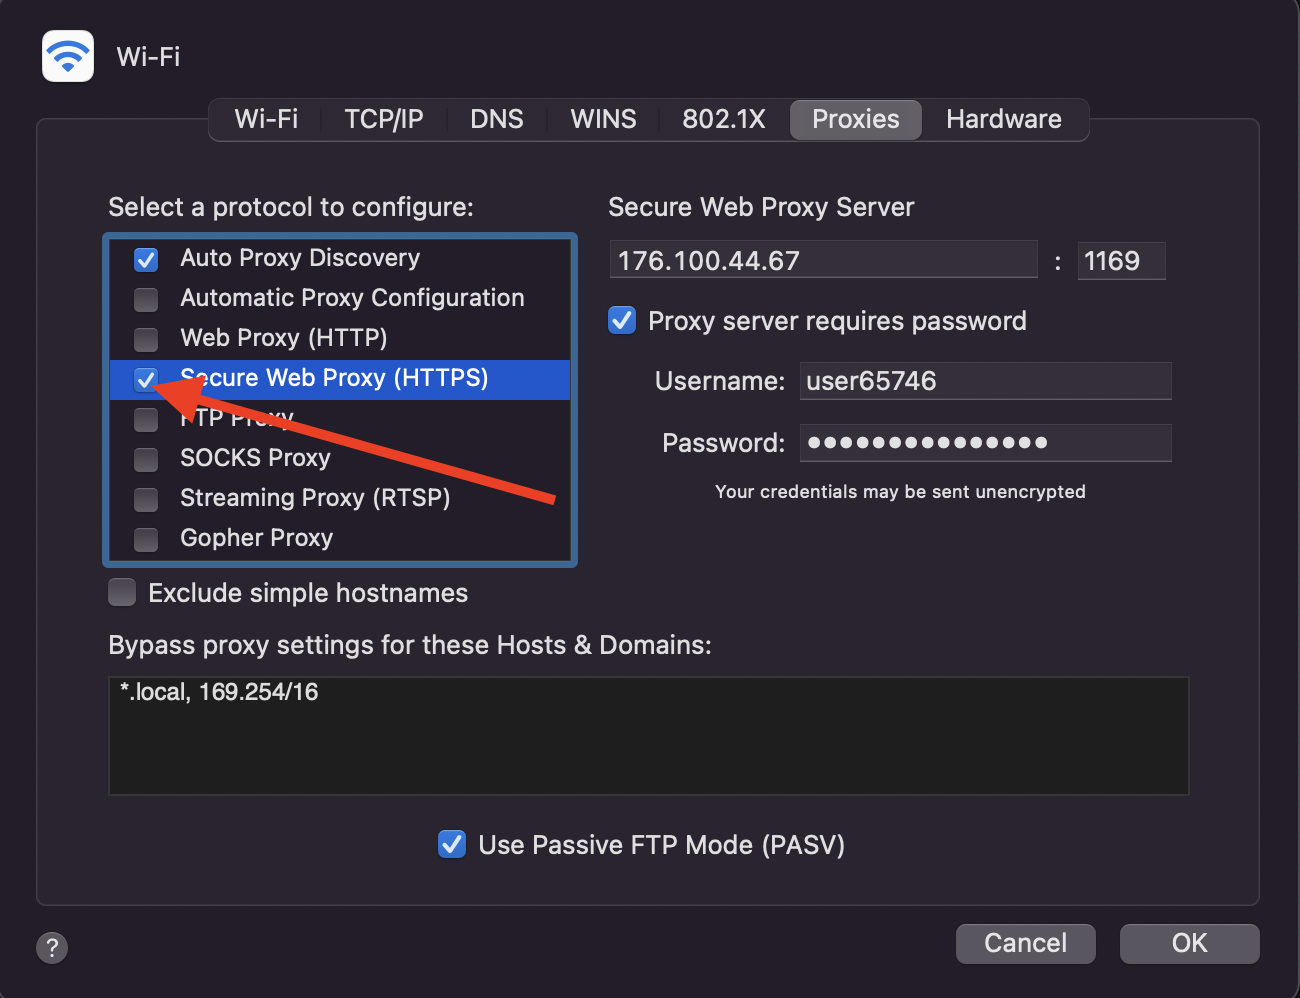
- Check the "Secure Web Proxy(HTTPS)" box, then enter the IP and port, check the "Proxy server requires" password and enter authorization information. Click "OK." The window will close and you will return to the network settings.
- Click "Apply" in the window that appears to complete the settings. After that the proxy is active for the current network connection.
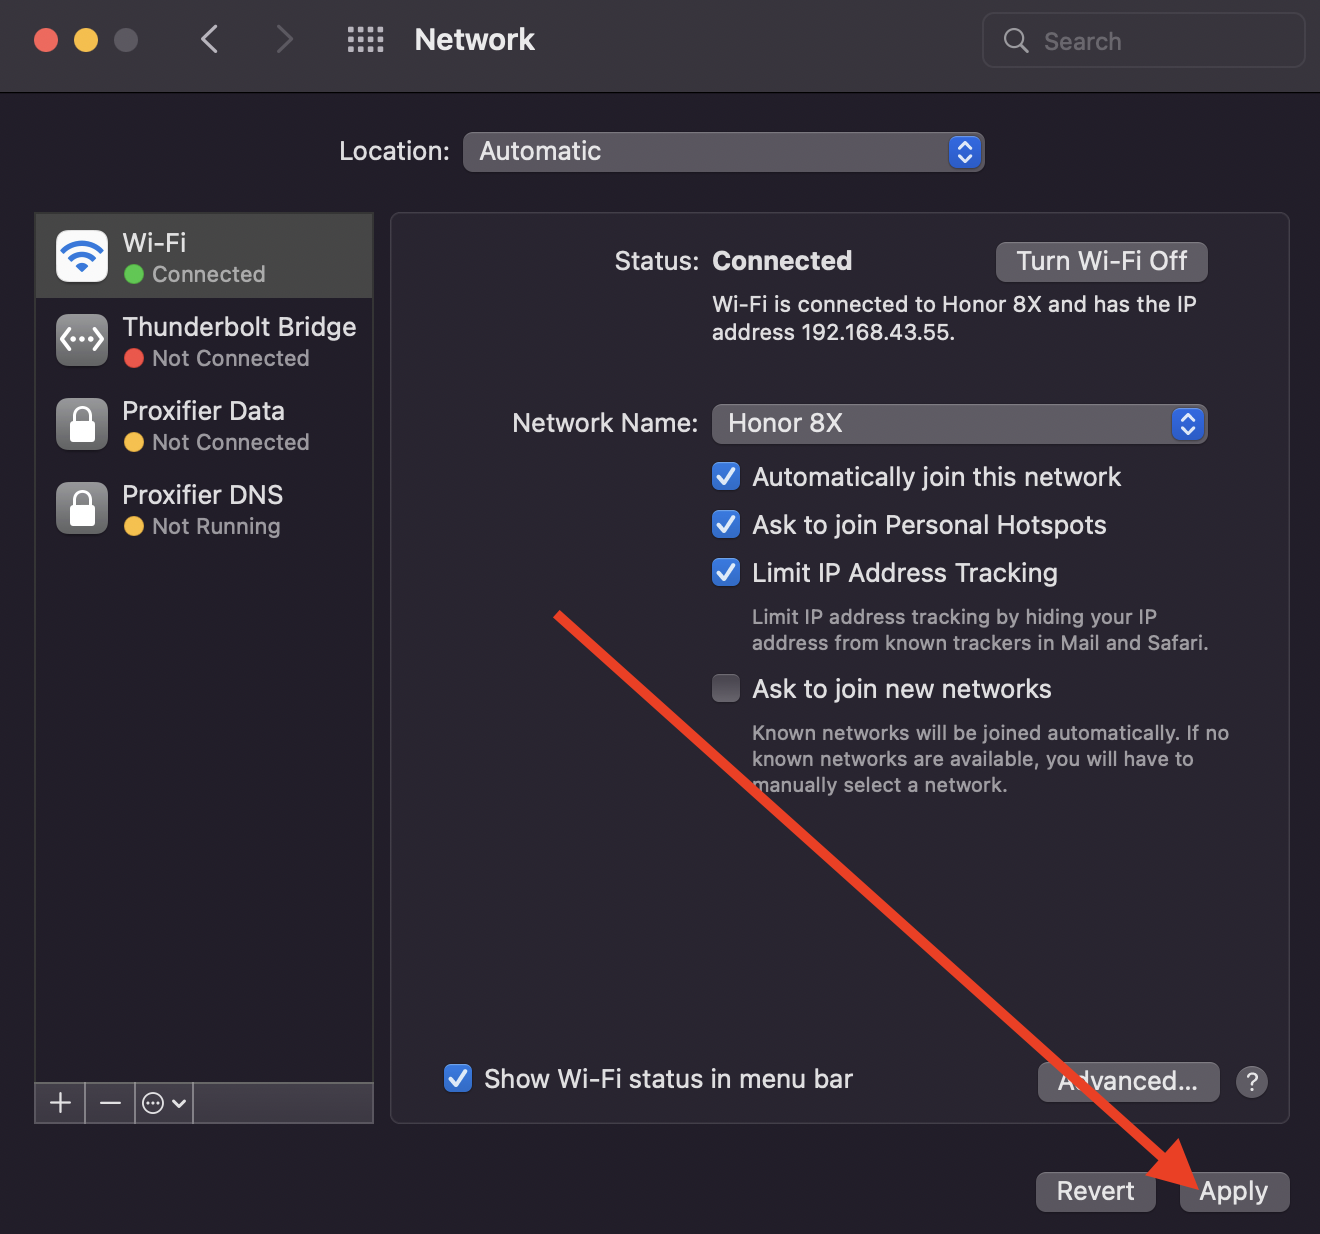
A few practical notes about this method. The proxy applies to the whole system, not only to Chrome: Mail, the App Store and other apps that follow macOS network settings will send traffic through it as well. The configuration is tied to the network service you set it on (Wi-Fi or Ethernet), so after connecting to a different network you will need to turn the proxy on again. macOS may also ask for an administrator password to unlock the Network pane. And note that Chrome’s built-in WebRTC can reveal the device’s real IP address to websites even with a proxy on, so it is worth checking for WebRTC leaks separately.
Now restart your browser and check if the settings took effect. On macOS, quit Chrome completely with Cmd+Q and open it again: closing the window alone does not end the process. The site internet.yandex.ru will help to do this. You can also confirm the new IP address and response time with our Proxy-Checker. If the setup worked, the checker will show the proxy’s IP address and country instead of your own.
If pages stop loading after that, Chrome usually shows ERR_PROXY_CONNECTION_FAILED or ERR_TUNNEL_CONNECTION_FAILED: re-check the IP address and port, and make sure the proxy itself is active. A login window that keeps reappearing means the username or password was entered incorrectly.
Setting up a proxy through the system parameters is simple and does not require additional tools. However, there is one disadvantage - you will have to go to the settings each time you want to enable, change or disable your proxy. This is not the most convenient way, therefore, we will show you another one that is much more universal.
Setting up via ProxyControl extension
Here you will need to install an additional extension in Chrome, but further on the proxy configuration is reduced to the click of a button.
As of July 2026, ProxyControl's Chrome Web Store listing shows 50,000+ users and a 4.0 out of 5 rating from 76 reviews; the current version, 1.4.7.11, was released on April 28, 2025. One limitation to plan for: the extension supports HTTP(S) proxies only, so for SOCKS5 addresses you will need a system-level tool such as Proxifier instead.
- Go to the Chrome extension store and search for ProxyControl. The results will include the extension published by PROXYS.IO.
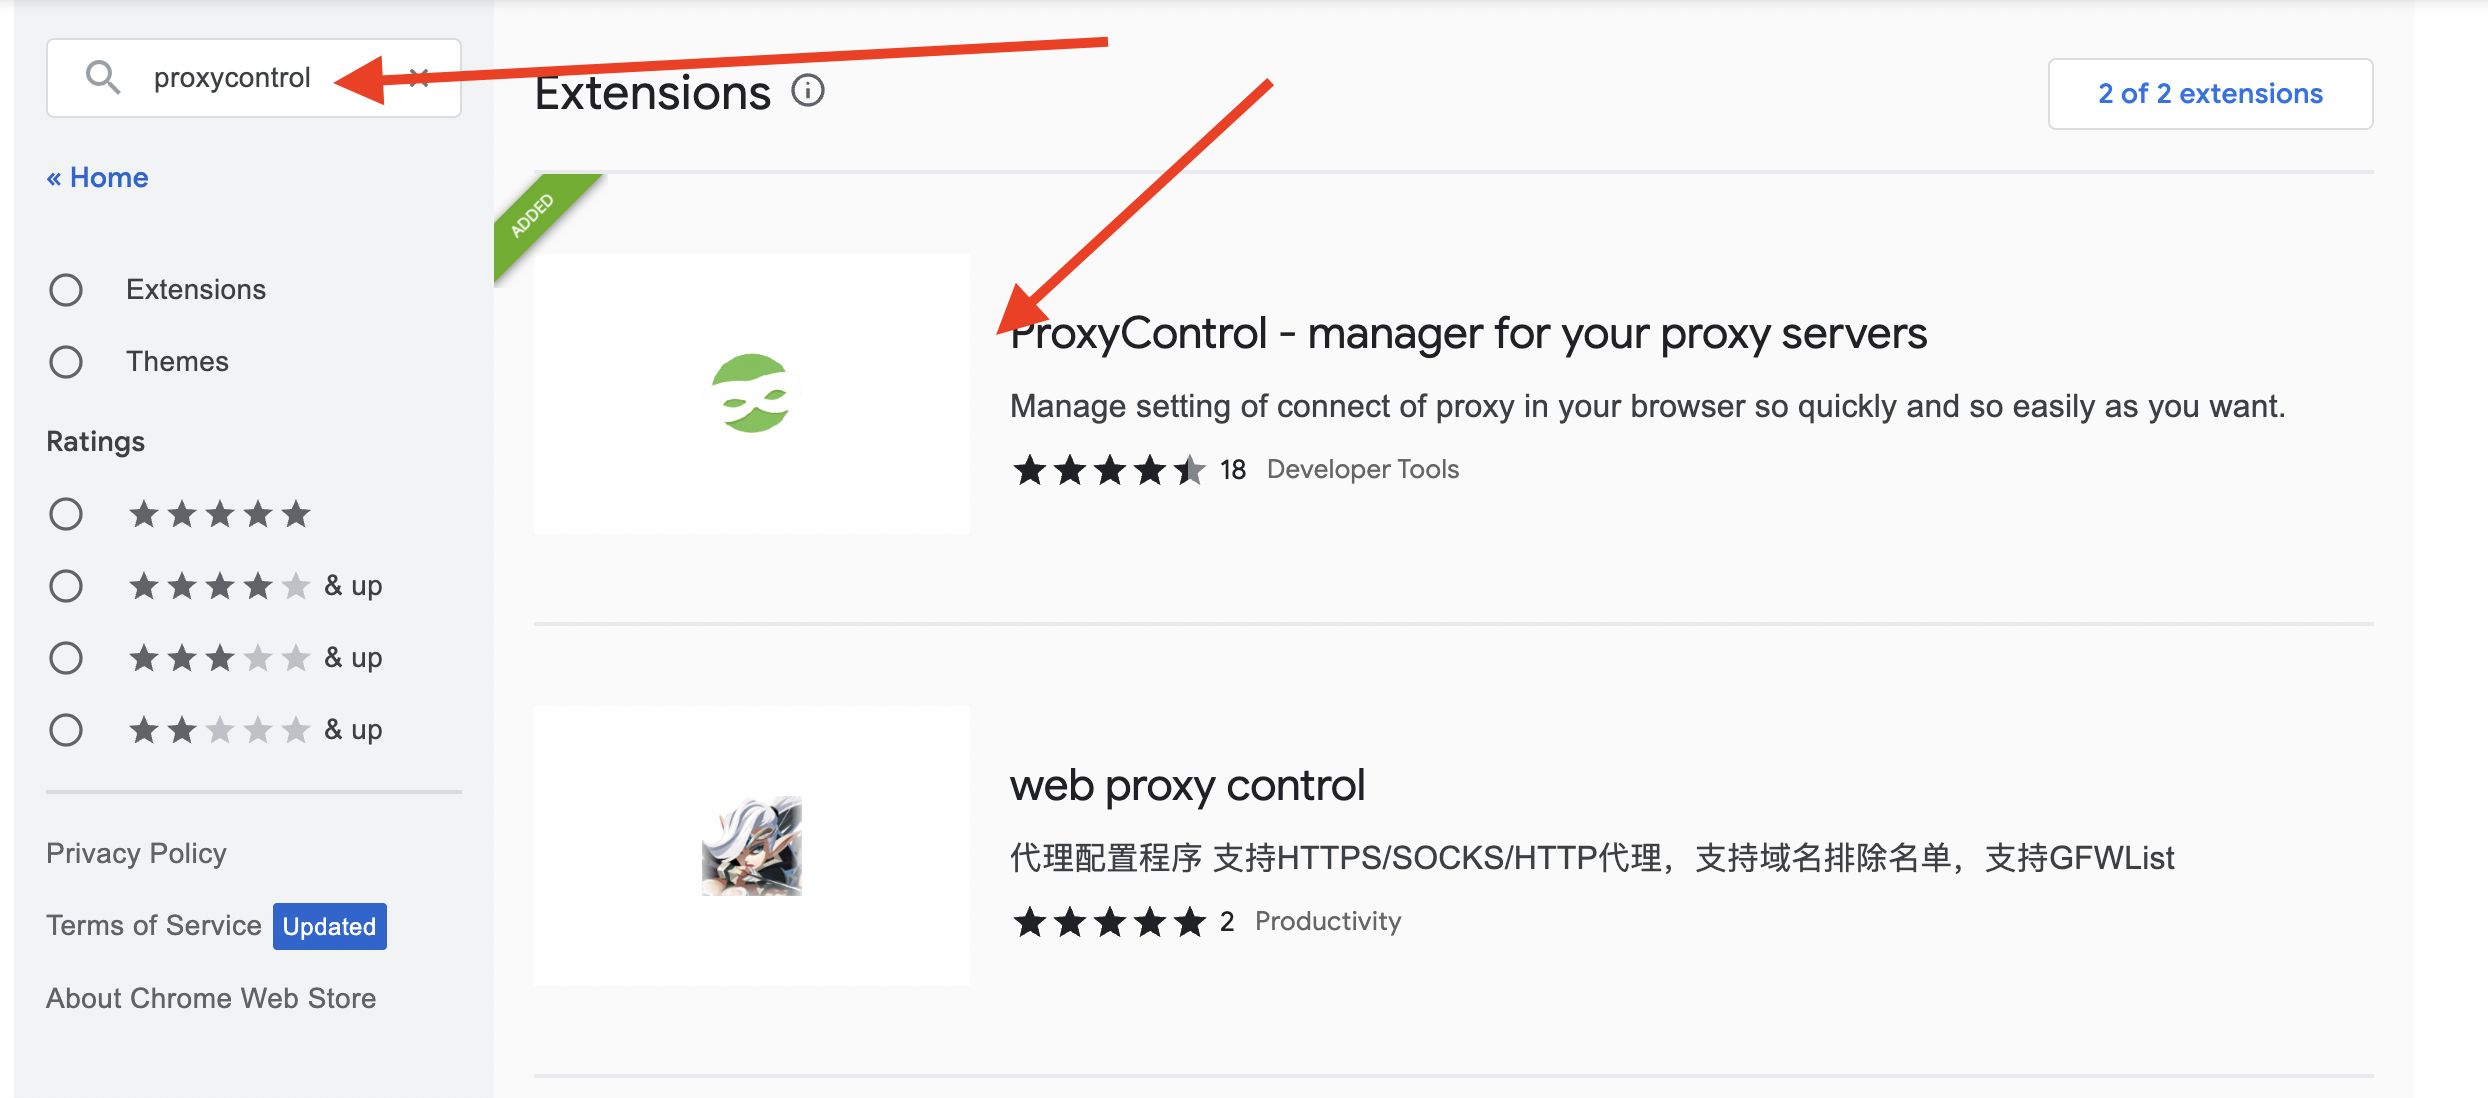
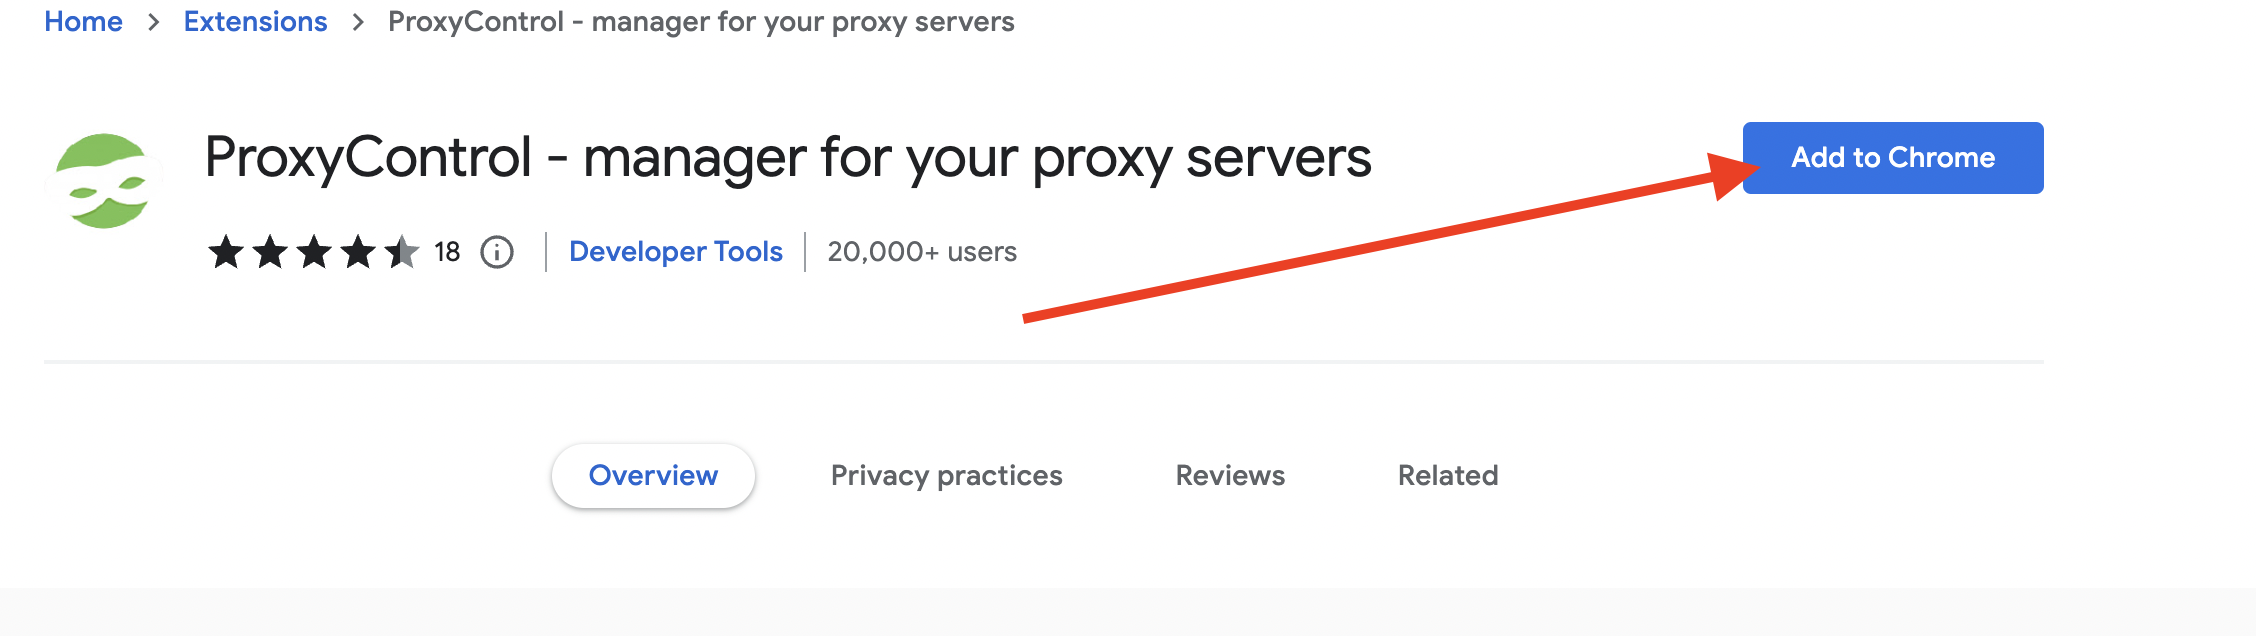
- Find the extension you need in the list, click on it, then click the "Add to Chrome" button and confirm the installation in the pop-up window. The ProxyControl icon will appear behind the puzzle icon on the toolbar.
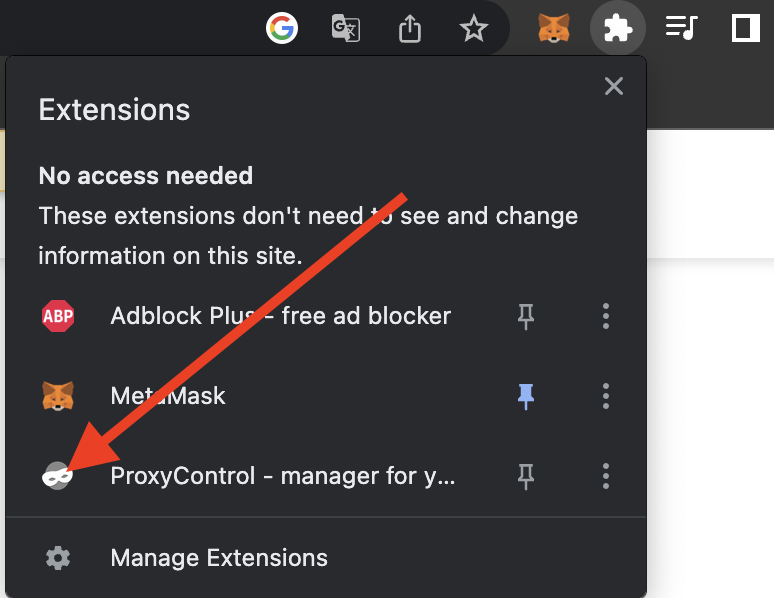
- Click on the puzzle icon in the top right corner of your browser and select Proxycontrol from the drop-down menu. A small extension window will open.
- Click "Go to settings."
A new page opens where you need to enter the data from the proxy. In contrast to the standard tools, there are three ways:
- Insert all the data through separate fields;
- Write everything in one line with separators;
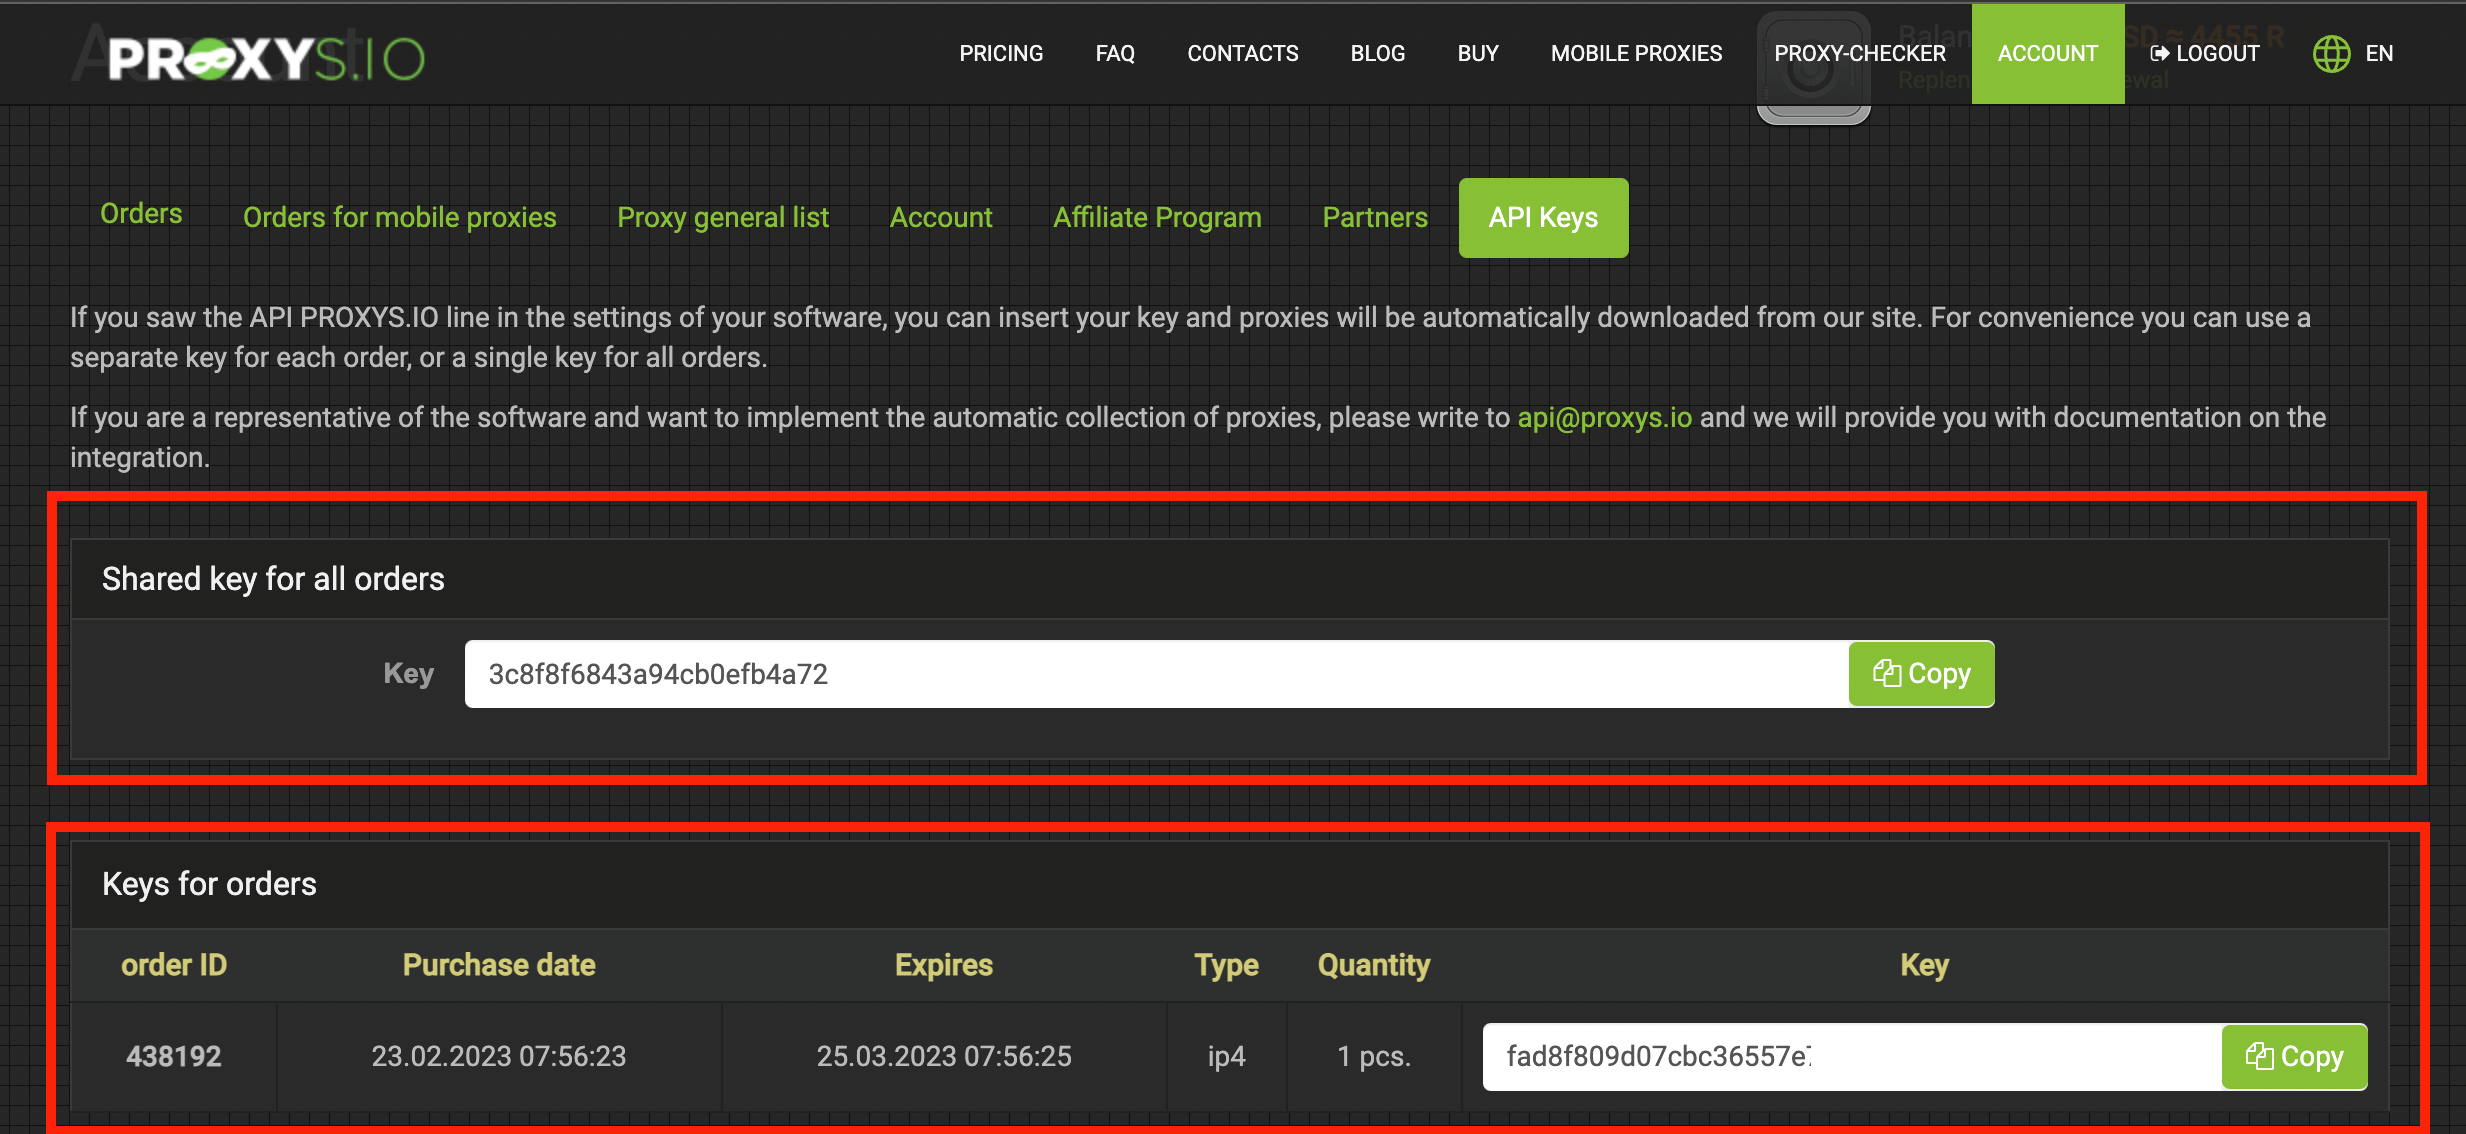
- Configure the proxy automatically through the API key.
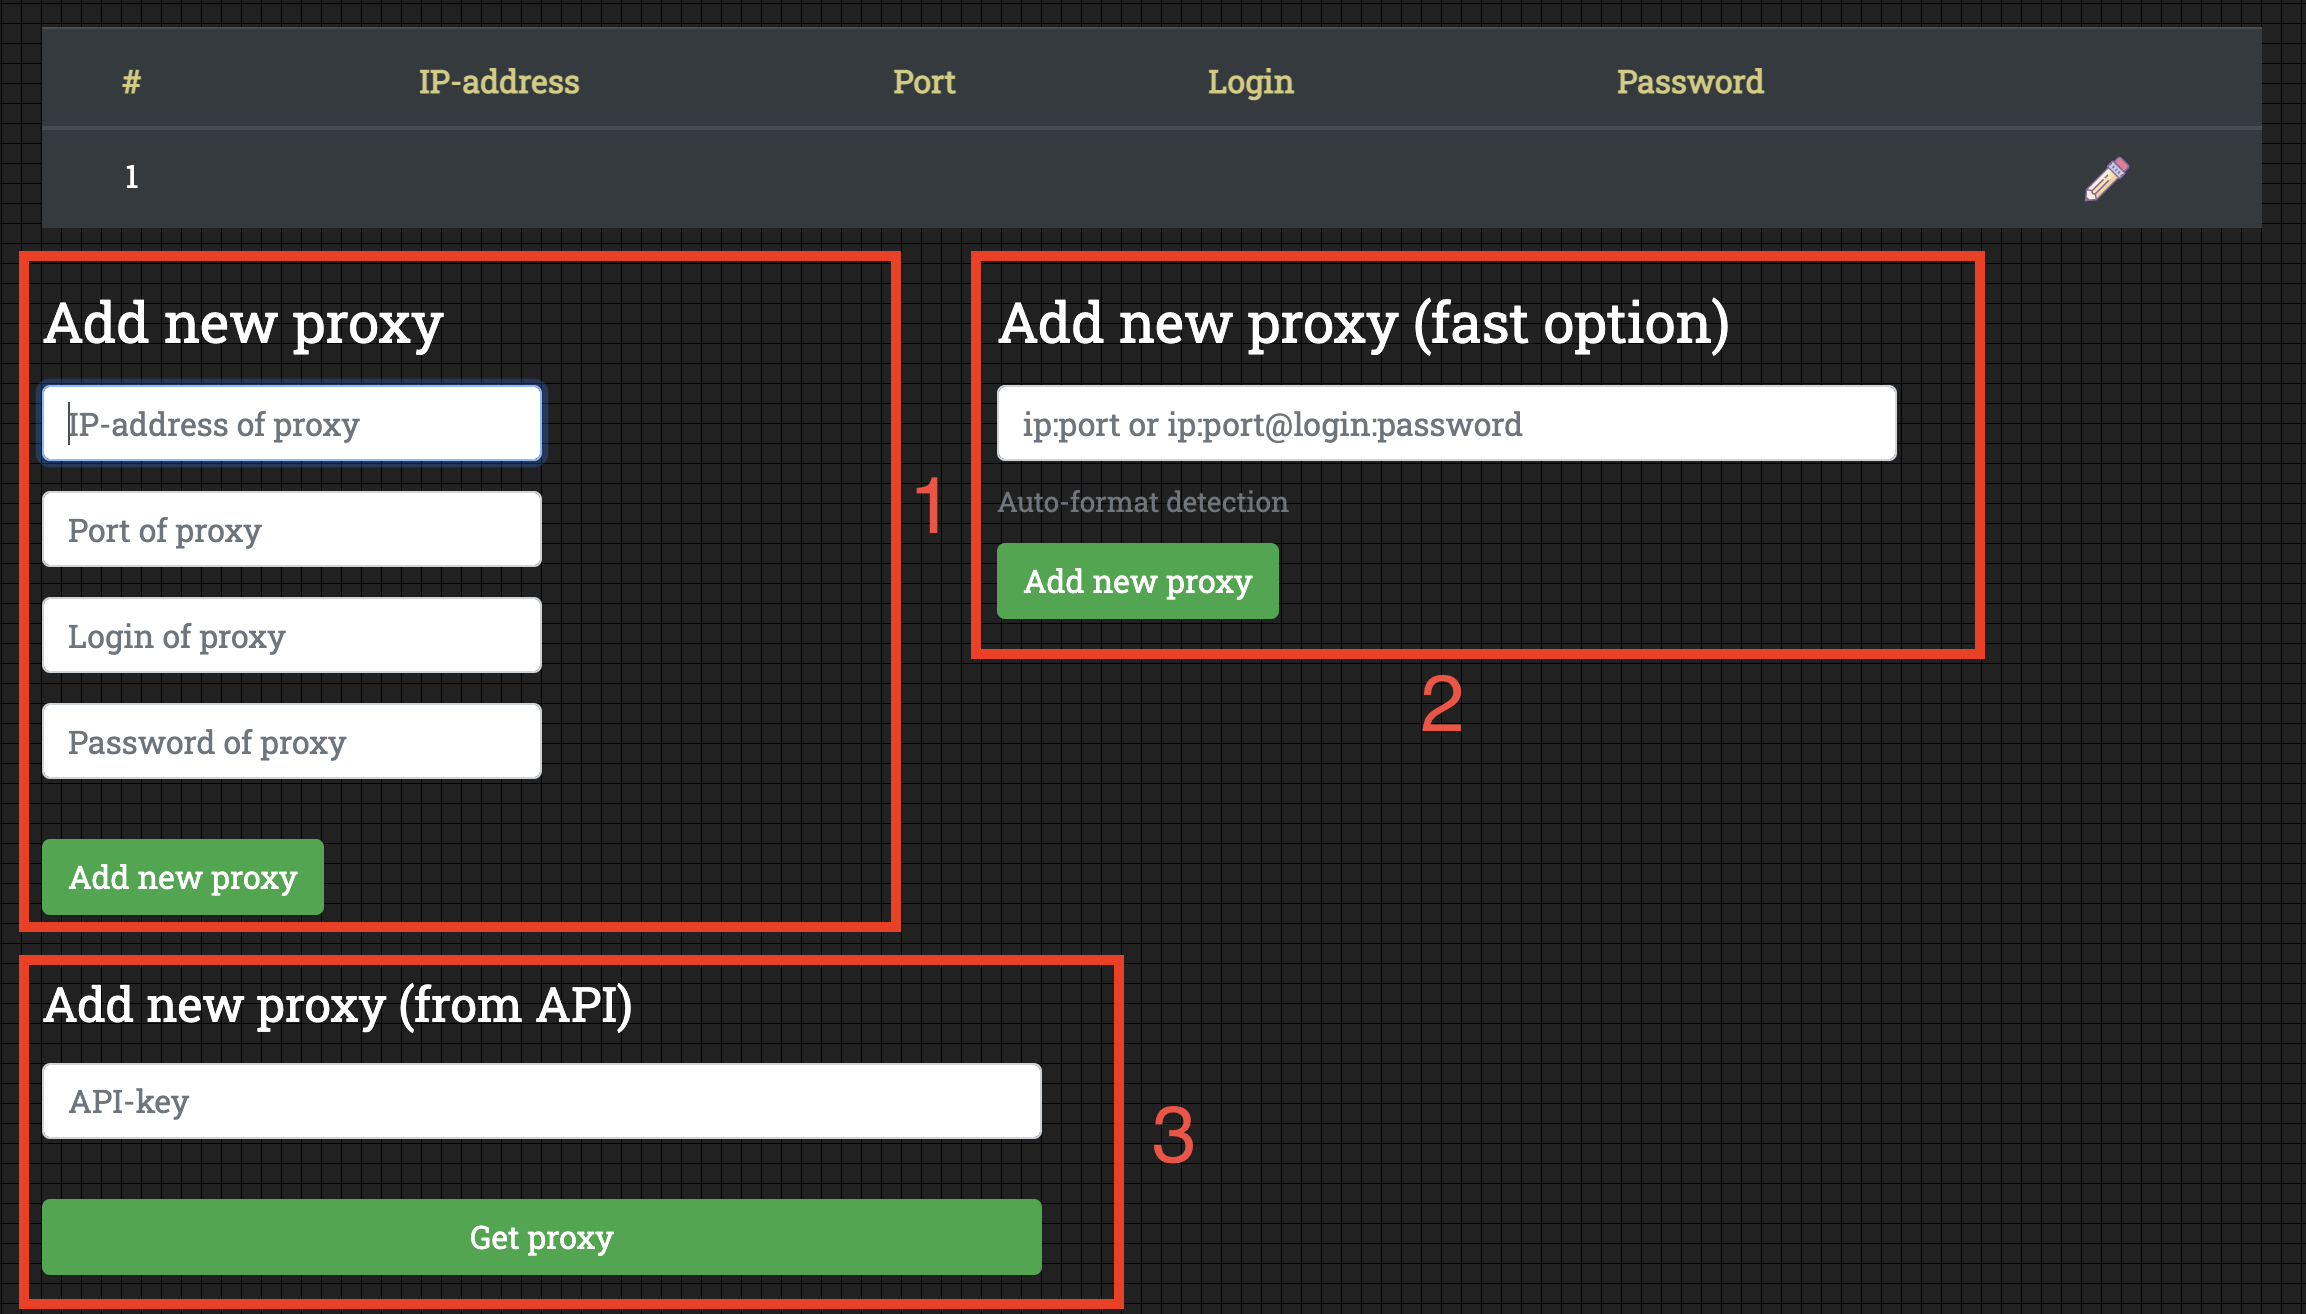
The last method is the most practical, because with it you can add an unlimited number of proxies at a time. The API key can be obtained from the "API Keys" section after you have bought one or more proxies from our website.
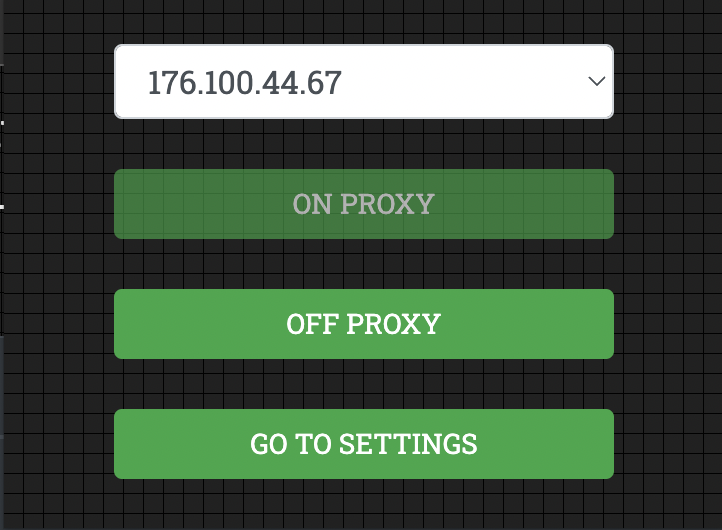
When you add a proxy in any way, it will automatically connect to your browser. To disable or change a proxy, click on the puzzle icon in the upper right corner of your browser and select Proxycontrol from the drop-down menu. All the necessary actions will be available there.
Learn more about how to configure proxies through Proxycontrol in this article.